

Access the Azure Resource Manager Virtual Machine resources using ARM APIs (Part 2)


In the last post, we saw how a user can be created in Azure Active Directory (AAD) and can be authorized to access Azure Resource Manager (ARM) resources.
Next, we'll look at how we can create an application that can consume these ARM APIs in the context of the AAD user we created earlier. This would also require registering this application with AAD.
Step 2.c: Registering your application with Azure Active Directory (AAD)
In the Azure classic portal, go to the Azure Active directory section (in this case the default AAD instance) and once there go to the Applications tab.
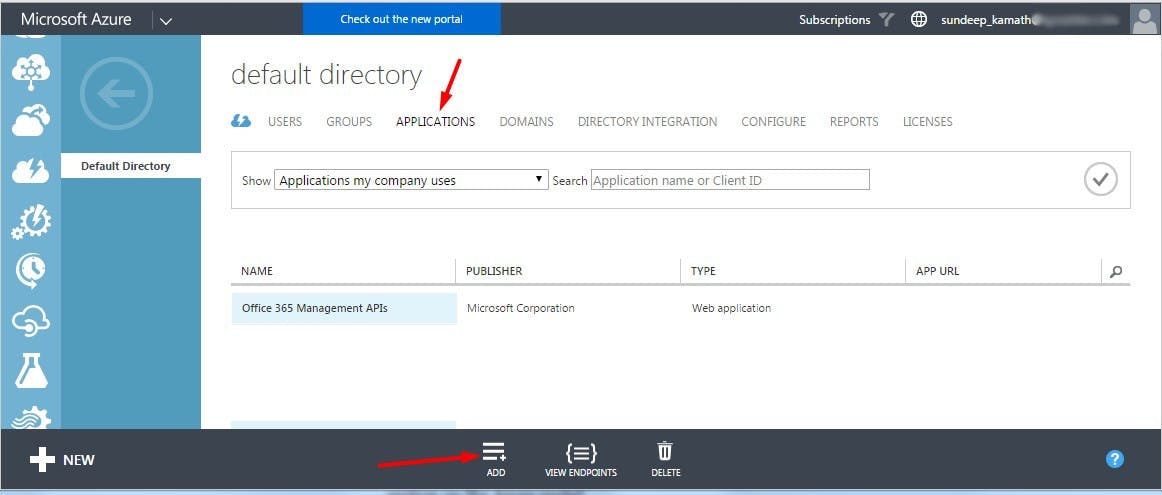
Click on the Add option towards the bottom of this page. This will open up a wizard as follows...
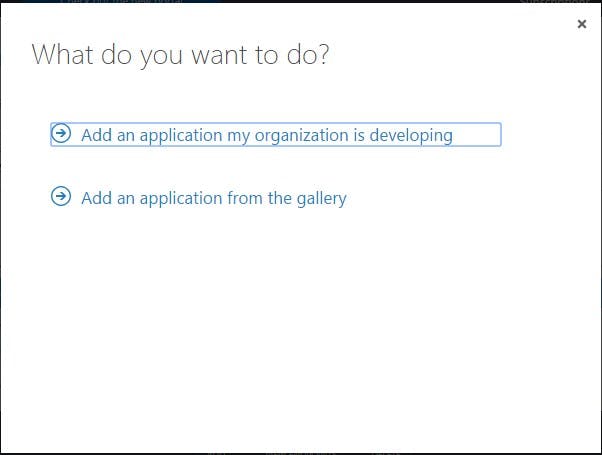
Select the first option Add an application my organization is developing. On the next screen give a name to your application. In this case, I have given a name ARMClient.
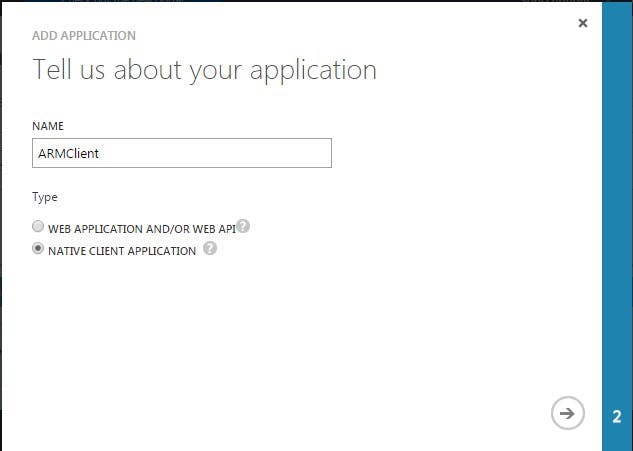
Select the native client application option. In case you plan to use the ARM APIs from your web application then you should select the first option i.e. Web application and/or Web API. If however, you are using a desktop application, mobile application, service or daemon then use the second option. In our case, we'll be later writing a console application and hence we'll register our application as a native application. There are some other subtle differences as well, but I'll probably cover those as part of a separate blog post in the future.
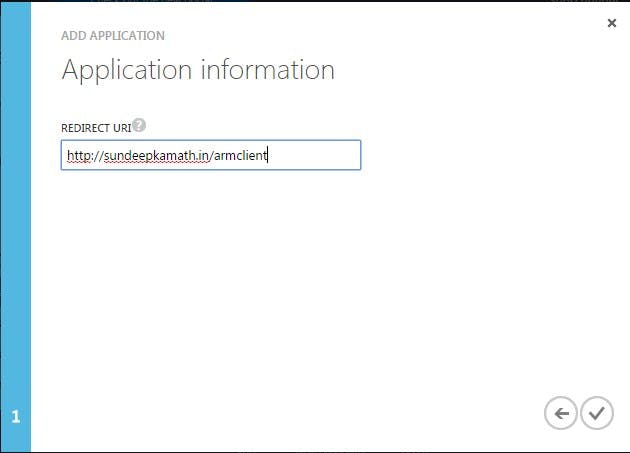
The next page asks for a Redirect URI. This is just a unique identifier for our application. While the URL matters in the case of a web application, in the case of a native application this just needs to be a unique URI. You can add any unique URI, it need not point to an actual working web URL.
Once click on submit it will bring up a page like the following...
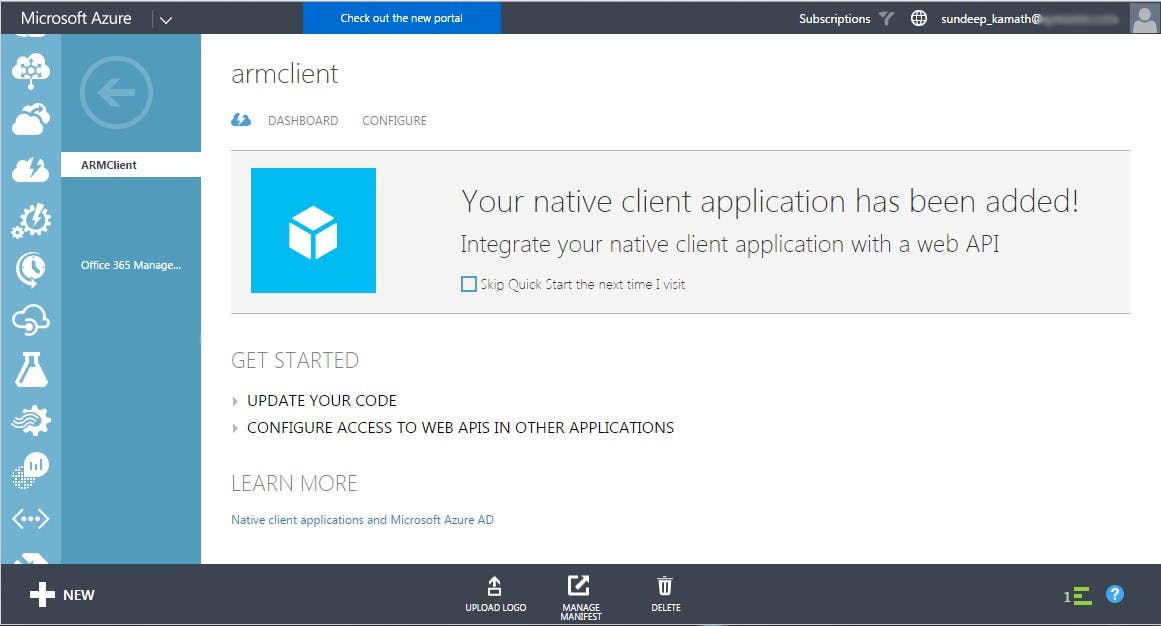
There is one last step remaining. Go to the Configure tab and scroll down to the section permissions to other applications

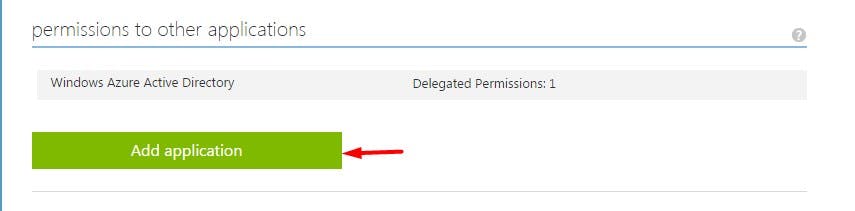
Click on the Add application button, this will bring up the following dialog.
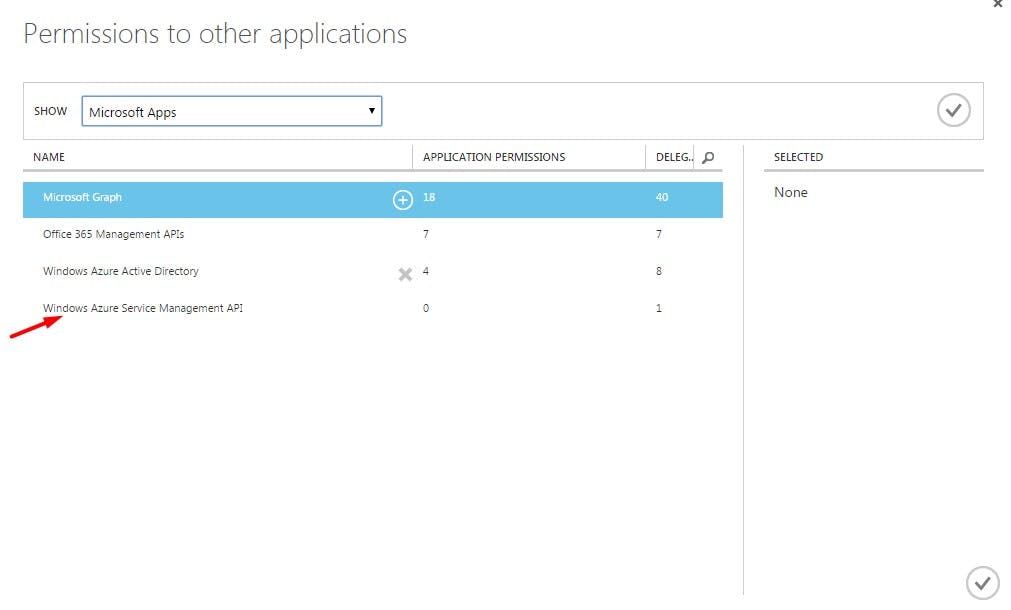
Click on the Windows Azure Service Management API option so that it moves over to the Selected column over to the right.
Once selected, click on the check box to Delegate Permission to access the Azure Service Management APIs.
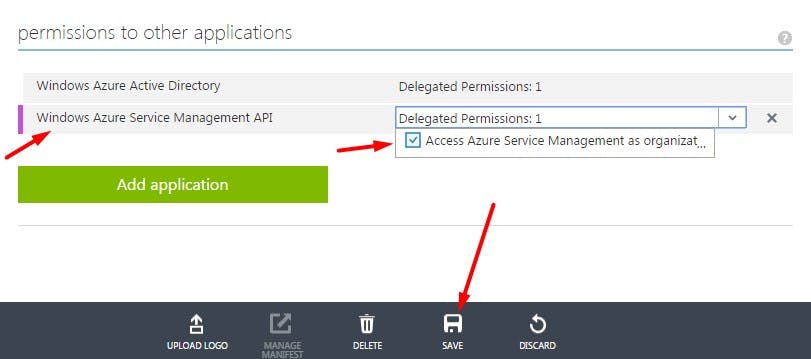
Once done click on the Save button at the bottom. All that we have done in the last few steps are delegate permissions for our application to access the ASM APIs
With this, we are done registering our application with AAD. Next, we'll implement a console application in C#.Net to consume the ARM APIs and before that, we'll prepare the data for the same.
Step 3: Prepare the data required to call the ARM REST APIs
We need 4 main parameters to access the ARM APIs.
Client Id
Tenant Id
Username
Password
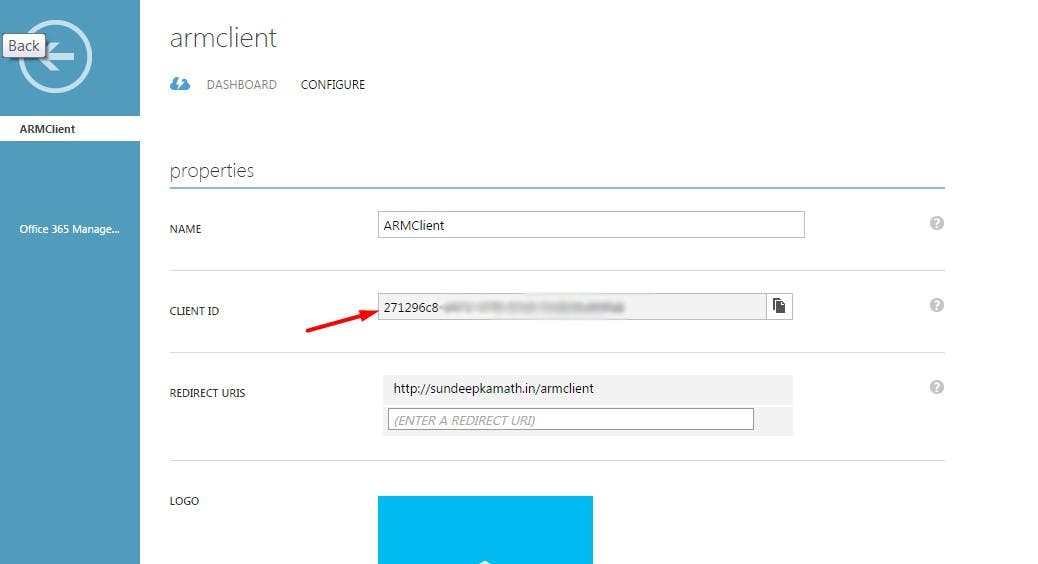
Client Id This is the unique id for our application registered with AAD. This can be obtained from the Configure tab.
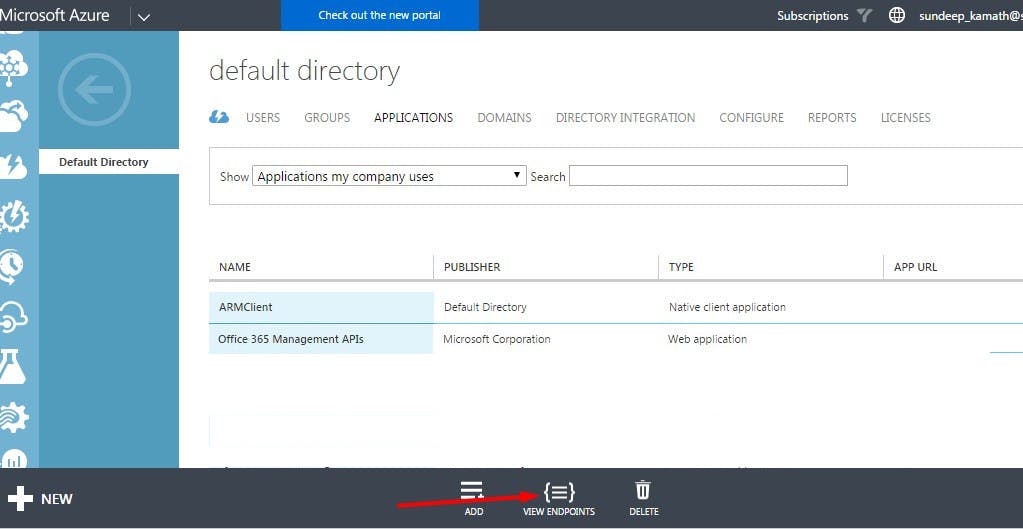
Tenant Id This is a unique id that represents our AAD instance. This can be obtained from the View Endpoints link in the AAD section as follows...
On clicking this link, you'll come across the following dialog that lists all the endpoints...

Select the GUID value shown in the screenshot. You'll find the same GUID being used in each of the endpoints. This is the unique id for the AAD instance.
Username and Password This is the user that we created earlier in Step 2.a
In addition to these, we'll also require the following additional parameters.
Service resource id The value of this id is https://management.core.windows.net/
OAuth endpoint This URL is used for authorization and its value is https://login.microsoftonline.com/<tenant Id>/oauth2/authorize As shown above, the authorization URL requires the tenant id.
With this, we now have all the details to go ahead and implement a REST client to consume ARM APIs.
Step 4: Consume the ARM API using the REST client and dependent parameters
Let's create a simple C#.Net Console application to implement this.
Let's update the App.config file with the necessary input parameters as follows...
<?xml version="1.0" encoding="utf-8" ?>
<configuration>
    <startup>
        <supportedRuntime version="v4.0" sku=".NETFramework,Version=v4.5.2" />
    </startup>
  <appSettings>
    <!--Add your tenant id here-->
    <add key="tenantId" value=""/>
    <!--Add your client id here-->
    <add key="clientId" value=""/>
    <!--Add your Azure AD user account here-->
    <add key="username" value=""/>
    <!--Add your Azure AD user account password here-->
    <add key="password" value=""/>
    <add key="oauthUrl" value="https://login.microsoftonline.com/{0}/oauth2/authorize"/>
    <add key="serviceResourceId" value="https://management.core.windows.net/"/>
    <!--Add your resource group and VM name here in this url-->
    <add key="resourceVMDetailsUrl"
         value="https://management.azure.com/subscriptions/c1c29229-7bcc-4d0f-b00d-21e6627f1998/resourceGroups/SK_RG_B/providers/Microsoft.Compute/virtualMachines/SK-VM-Win2?api-version=2015-06-15"/>
  </appSettings>
</configuration>
Replace all placeholders shown in the above settings xml with the respective valid values as per your scenario.
We'll now create a class AzureAD.cs to authenticate our user and get an access token which can later be used to call the ARM-based REST APIs.
using Microsoft.IdentityModel.Clients.ActiveDirectory;
using System;
using System.Configuration;

namespace AzureResourceVMIntegration
{
    public class AzureAD
    {
        public static string Authenticate()
        {
            AuthenticationContext authContext = new AuthenticationContext(
                                                    string.Format(ConfigurationManager.AppSettings[Constants.OAuthUrl],
                                                     ConfigurationManager.AppSettings[Constants.TenantId]), true);
            AuthenticationResult authResult = null;

            bool retry = false;
            int retryCount = 0;

            do
            {
                try
                {
                    authResult = authContext
                                    .AcquireToken(ConfigurationManager.AppSettings[Constants.ServiceResourceId],
                                                  ConfigurationManager.AppSettings[Constants.ClientId],
                                                  new UserCredential(ConfigurationManager.AppSettings[Constants.Username],
                                                  ConfigurationManager.AppSettings[Constants.Password]));

                }
                catch (AdalException adEx)
                {
                    if (adEx.ErrorCode == "temporarily_unavailable")
                    {
                        retry = true;
                        retryCount++;
                    }
                    throw;
                }
            } while ((retry == true) && (retryCount < 3));

            if (authResult == null)
            {
                Console.WriteLine("Cancelling attempt.....");
                return null;
            }

            Console.WriteLine("Authenticated successfully making HTTPS call.");
            return authResult.AccessToken;
        }
    }
}
We'll also need a class to place REST API calls using this access token. We'll create a class AzureRestClient.cs for this.
using System.Net.Http;
using System.Net.Http.Headers;
using System.Threading.Tasks;

namespace AzureResourceVMIntegration
{
    internal class AzureRestClient
    {
        internal static async Task<string> ExecuteRequest(string accessToken, string url)
        {
            string serviceBaseAddress = url;
            string responseMessage = null;

            HttpClient httpClient = new HttpClient();

            httpClient.DefaultRequestHeaders.Authorization = new AuthenticationHeaderValue("Bearer", accessToken);
            HttpResponseMessage response = await httpClient.GetAsync(serviceBaseAddress);

            if (response.IsSuccessStatusCode)
            {
                responseMessage = await response.Content.ReadAsStringAsync();
                return responseMessage;
            }
            else
            {
                responseMessage = await response.Content.ReadAsStringAsync();

                if (response.StatusCode == System.Net.HttpStatusCode.Unauthorized)
                {
                    return "Access denied.";
                }
                return responseMessage;
            }
        }
    }
}
With this we can now fetch details of our VM SK-AVLSC1 as follows...
using System;
using System.Configuration;

namespace AzureResourceVMIntegration
{
    class Program
    {
        static void Main(string[] args)
        {
            string accessToken = AzureAD.Authenticate();

            if (accessToken != null)
            {
               AzureRestClient.ExecuteRequest(accessToken, ConfigurationManager.AppSettings[Constants.ResourceVMDetailsUrl])
                    .ContinueWith((task)=>
                    {
                        Console.WriteLine(task.Result);
                    });

            }
            Console.ReadLine();
        }
    }
}
For more details on the REST API used to fetch VM details refer to the Azure reference guide here.
Once you get the response, you can parse the JSON result and extract the relevant data from it. You may also download the source code for this from my GitHub repository.
Do explore the Azure Reference documentation which lists several other APIs that can be used. In all cases the code remains the same, only the REST API URL and its dependent parameters would change.
Hope this was useful!